A Year of ToneBoard

A year ago today, I released my first iOS app, ToneBoard Keyboard, onto the app store. ToneBoard is a Chinese keyboard for iOS that helps you learn Mandarin Chinese tones while you type. I had meant to write up some thoughts on the process of making and releasing the app then, but I never got around to it. Better late than never!

Background

I have been casually studying Mandarin, mainly using Duolingo, for a year or two, but the inspiration for ToneBoard actually came from studying Vietnamese, which I have been doing longer and more seriously. When you type Vietnamese with the common “Telex” keyboard, you have to input the tones as you type. For example, to write (“to have”) you type “cos” (with “s” indicating the tone), but to type cỏ (“grass”) you type “cor”. I found this necessity to type tones while studying Vietnamese with Duolingo to be a great memory aid.

With the normal Mandarin iOS keyboard on the other hand, you just type toneless pinyin and take your pick of matching Chinese characters. For example, you can simply type “ni hao ma” and then tap the “你好吗” character choice.

Enter ToneBoard

I knew it should be possible to create a custom iOS keyboard that combines Vietnamese and Mandarin typing experiences, using pinyin with tone numbers like “ni3 hao3 ma5”. Unable to find one in the app store, I set about hacking together my own keyboard that fit the bill.

After a couple weeks of tinkering, I had a serviceable keyboard. Here’s a video of it in action (from ToneBoard’s own in-app tutorial):

Making the sausage

I’ll gloss over most of the specifics of how I actually implemented the keyboard. Anyone interested in the gory details can see the source code on GitHub. In short, to make a custom iOS keyboard, you have to make a normal app (what Apple calls the “host app”) with a keyboard “extension”. Once the app is installed, users can enable the custom keyboard in the Settings app.

The main thing that’s different about making a keyboard compared to a normal app is that while a normal app has lots of power and control over everything iOS can do (display things all over the screen, access the internet, play sounds, etc) the custom keyboard only has a limited little box of screen space and functionality to work with. This can make the development and troubleshooting process a little difficult compared to normal apps. There are also far fewer examples to refer to. (I have to give a shout out though to both KeyboardKit and this WWDC2017 presentation. The WWDC talk has apparently been taken down, so I linked to the WayBack URL for it.)

Here are a couple behind-the-scenes shots of ToneBoard coming together:

My “hello world” keyboard. It’s red!
A rough version of the keyboard. I think this version supported typing exactly one word.

Once I got a keyboard to show up on screen, I had to actually supply the appropriate Chinese character choices for any given pinyin input. Most Chinese keyboards suggest whole words and sentences for you as you type, but I found this to be too much of a crutch when studying with apps like Duolingo. Instead, ToneBoard only displays character choices for one word at a time. I used CC-CEDICT to supply dictionary data and Google’s ngram datasets to be able to display the most common words first. I supplemented the Google data with Unicode’s Unihan database to find the frequency of various readings for characters that can be pronounced in different ways. All of these data sources are amazing, and I’m very grateful to their various authors and contributors.

While I originally made ToneBoard to scratch my own itch, I thought it could be generally useful to others studying Chinese, and that it would be a fun challenge to tidy it up a bit and make it available in the Apple App Store. Initially, I added a couple of simple documentation screens to the “host app” and figured that would be enough. When I tested the experience of installing and running the app however, it just didn’t feel “like an app”. I imagined Steve Jobs spinning in his grave as my poor ToneBoard users swiped and tapped in vain trying to figure out how to use the keyboard. Ultimately I opted to created a tutorial in the app (shown in the video above) that would let users try the keyboard immediately after installing the app, without having to faff around with the settings to make the keyboard work globally in other apps. Tutorial and docs done, and after testing the app on all the aging iOS devices in various drawers around my apartment, I felt like ToneBoard was ready for the world.

The launch

I submitted my app to the App Store on Christmas Eve, 2021. I had heard that the review process could take anywhere between hours and months, and that it could be particularly slow during the holidays. Four days later, I woke up to find that ToneBoard was “ready for sale” (which is what Apple says when your app has passed app review, even if it’s a free app). I excitedly told a few friends and dashed off a post on Reddit. Surprisingly, some downloads actually started to trickle in.

Total ToneBoard downloads in 2022: The spike is from the Reddit post at launch

Since launching a year ago, ToneBoard has been installed about 400 times. This is probably unremarkable for most app creators, but considering my extremely minimal marketing, I was pretty pleased with this. I didn’t add any kind of tracking or data collection to the app, so I don’t know much about what ToneBoard users do after installing it. I hope that the sustained stream of downloads is evidence of at least some actual adoption. A few Reddit comments and emails did prove to me that at least some random internet people tried it, which is always a good feeling.

Big in Cambodia

The biggest surprise to me as I monitored ToneBoard usage was that Cambodia quickly became the leader of the pack in download numbers, with other Southeast Asian countries like Indonesia and Malaysia also seeing a significant number of installs. This seems consistent with reportedly high demand for Chinese speakers in Cambodia.

This trend also makes me hopeful that there is at least some amount of word-of-mouth spread of ToneBoard users in places like Cambodia. I wouldn’t expect such pronounced adoption in certain regions like this based purely on random App Store searches (in which case I would expect other countries with large Chinese-learning populations to be better represented).

Looking forward

As far as new functionality, I have already received a few feature requests from friends, family, and internet strangers. The first of these, from my friend Lev, was actually already released in version 1.1. Lev asked that there be some kind of warning when characters are displayed because you have typed in one of their less common readings. For example, 吗 is usually read “ma5” (neutral tone), but it is occasionally read “ma3” (as in 吗啡, ma fei, “morphine”). There is now an option in ToneBoard called “Indicate rare tones” that displays asterisks next to characters for rarer readings (e.g. inputting “ma3” will now show “吗*” among the results). Lev’s first choice was that you hear a cowboy-style voice that says something like “Woah, not so fast, buckaroo!” when using the rare readings, but he also found the asterisk to be acceptable.

The next big feature request came from my wife (the most VIP ToneBoard user), who asked for the ability to have each character or word spoken out loud while typing. I tried to build this using iOS’s built-in text-to-speech capabilities, but the voice quality of on-device text-to-speech was not that great. Instead, I implemented the feature using Amazon Polly to generate audio ahead of time. This sounds great but generates about 650MB of audio data, which is pretty big to shove into an iOS app. I have explored options to allow users to optionally download the audio data, but for now the feature is still in development.

Finally, a friendly ToneBoard user reached out via email to report a bug (since fixed), and also made a feature request. He pointed out that it’s easy to learn the position of common characters among the list of choices (e.g. remember that 坐 is the third choice when you type “zuo3”), so he asked that the order of characters be randomized. This is not implemented yet, but the request is being tracked here in the GitHub issues list. Anyone else with bug reports or feature ideas is welcome to add to the list!

So that’s about it for ToneBoard in 2022 and beyond. And as it’s the time of year when many of us celebrate the birth of not only ToneBoard, but also the Son of God, I wish my several blog readers a merry Christmas and a Happy New Year!

On Steel

NOTE: This is a post that I began writing in 2017, back when I was last trying to blog. In order to wash away any guilt about not blogging for so long, I feel like I should go ahead and publish it in some form. One of the reasons I never completed this particular post was the challenge of finding good resources on the history of steel. Fortuitously, Bret Devereaux’s acoup.blog now has an incredible series on the history of iron and steel. I can’t hope to match the quality of that series, so suffice it to say that you should read that if you want to know about pre-modern steel production (albeit mainly from a Western perspective).

I’ve been fascinated lately with the ancient history of steel manufacture. The seeds for this fascination were almost certainly sewn during the year I lived in Shimane, Japan in 2009-10. That prefecture was the biggest steel producer in the country throughout history (by the end of the Edo period over 80 percent of Japanese steel was made there). I even had the opportunity to participate in a small-scale traditional smelting operation with some of the craftspeople keeping the tradition alive.

CA3C0034
Me, gettin my smelt on in Shimane.

During this initial steel obsession, I picked up a nice Misono carbon steel knife and tried learning to shave with a traditional Japanese-style razor (this didn’t go well). If I were, say, a marooned Dutch sailor in the 1600s, I may very well have settled down and tried my luck as an apprentice smeltmaster, but being a modern non-Dutch non-sailor, I soon returned to the US and didn’t think much about the exciting history of steel for the next half-dozen years.

iwasaki-razor-japanese-style-razor-50mm-sweden-steel-5
The kind of traditional razor I never learned how to use. [image source]

The steel-making tradition resurfaced in my consciousness occasionally when sharpening my kitchen knives or considering purchasing new ones. Even in its dormancy, my passion for fine steel meant I was plenty willing to invest in good knives and accessories, but as a person of science, I was also extremely frustrated by the confusing combination of pseudoscience and marketing buzzwords surrounding the world of high-quality knives.

This frustration and curiosity came to a head during a day or two of binging on various internet information about camping, “survival”, and “bushcraft” knives. Most American websites and online stores dedicated to the topic had kind of a post-apocalyptic, Ted Nugenty vibe, so I found refuge in a YouTube channel called Dutch Bushcraft Knives that was a little more moderate. I don’t know if it was the in-depth discussion of various steel alloys appealing to the material scientist in me or the charming Dutch hosts reminding me of my Edo-period-castaway-smeltmaster fantasies, but a couple hours of videos featuring Swedish mora knives, artisan American-made blades, and Japanese water stones sent my steel obsession level to new heights.

For a while I decided to buckle down and really figure out this whole steel thing. I scoured the internet and book stores (including my beloved Powell’s). I found a book all about the history of salt, but nothing comparable about steel. I also found lots of strong opinions, both scientific and artisanal, about what exactly “Damascus steel” is. I came across a few interesting examples of experimental historical endeavors, like the TMS bladesmithing contest. I also discovered a great book about Japanese sword making. But alas, as far as finding some perfect harmony of historical records and modern science that would let me bring all the glory of Masamune’s legendary blades to my chopping of green onions, I came up empty handed.

The irony is that while forging superior edged weapons and tools defined the state of the art of steel technology–and at times maybe all technology–for most of history, it’s now surprisingly hard to find any reputable, scientific sources of information to back the semi-scientific claims of edge retention and Rockwell hardness that permeate modern knife marketing. It’s fairly understandable why this is the case. While sharper or harder blades may have been critical to military success in, say, the 13th century, once the whole scientific method thing really picked up steam, guns and cannons had pretty well made swords and spears obsolete. Now the modern state-of-the-art steels that dominate the metallurgical literature are used for things like I-beams and ship’s hulls.

I guess producing the ultimate edged weapons and tools may forever be a lost art, with its glory days locked in the past, like the art of getting my Windows Media Player MP3s perfectly organized and synced with my Dell Digital Jukebox. Next time I’m at Sur La Table shopping for the highest-Rockwell, Swedish-steel, Japanese-forged Damascus chef’s knife, I’ll just have to embrace the mystery.

Working through littleosbook on a Mac

A friend recently tipped me off to The little book about OS development, an excellent hands-on resource on writing a (simple) operating system from scratch. I’ve been working through the book, and it’s been an amazing learning experience.

A lot of the initial difficulty was in the tangential exercise of setting up a reasonable dev environment on my Mac rather than the inherent challenges of assemblers, interrupts, and virtual memory–though those can be plenty of “fun” as well!–so I thought I’d share a bit about how I set things up in the hope that it might benefit others working through the book on a macOS environment.

Building

The first challenge is putting together the toolchain to assemble/compile/link the various binaries that make up the kernel, boot loader, and other modules and bits. One challenge with doing this on a Mac is that the book assumes pretty deeply that you’ll be using Grub to load ELF binaries, which are not native to the Mac. I’m sure it’s possible to set up cross compiling with a custom GCC build on Mac and a handful of other carefully configured tools, but I found it much easier to just do all the compilation in a Docker container. In addition to providing a Linux runtime and fast binary installs of most of the ELF-compatible tools, this provides a complete config-as-code manifest of what’s in the core development environment.

The only prerequisite for this setup is Docker for Mac. Once that’s installed, you can clone my repo and give my setup a try. If you take a look around its structure, everything should look pretty familiar from the first chapter or two of the book–I did my best not to “give away” too much and keep it a minimal skeleton. The Dockerfile and script/* files, however, are my additions. ​The Dockerfile just contains a bunch of build utilities, an ISO utility, and custom-built Grub 2 (note that I’m using Grub 2 and grub-mkrescue to produce the ISO instead of the book’s Grub Legacy with a pre-built stage2_eltorito binary). ​I’ll explain the other scripts later. You can build a complete ISO by running docker run -v $PWD:/opt/littleosbook bellkev/littleosbook-mac make from the project root. It should go relatively quickly, as the pre-built Docker image will be pulled from Docker Hub by default.

Running

To run the OS, the book suggests the Bochs emulator, which appears to be quite popular for OS development. I tried looking around for binary installs and compiling Bochs myself on my Mac, but the experience was a bit dicey. I never really got it to run very happily. I considered running everything inside of a VirtualBox or VMware VM, but even if that’s possible, two layers of virtualization between the keyboard, monitor, etc and my OS didn’t sound fun. Instead, I opted to use QEMU, which seems to have much better cross-platform support (as well as being extremely widely used and well-maintained).

You can easily install QEMU with brew install qemu and run it with a command like qemu-system-i386 -cdrom os.iso. The script script/run-vm.sh takes care of both the Dockerized build process and running QEMU with some appropriate arguments. The QEMU “monitor” is also tied to stdin/stdout, so you can run info registers at the (qemu) prompt, and you should see EAX=00000006 (the result of the sum_of_three C function from the book).

Troubleshooting

A friend that was working through the book with Bochs pointed out that Bochs has some pretty handy built-in debugging capabilities, which lead me to explore what options were available in QEMU (and kick myself for not having done so earlier). Fortunately, QEMU is no slouch in this regard either. With a couple command line flags, you can instruct QEMU to open up a TCP listener for GDB remote debugging with all kinds of symbolic debugging features for both assembly and C sources.

Like in the compilation stage, there are some binary compatibility issues with GDB on Mac and ELF binaries. Again, it seems to be possible to solve the problem with a special, cross-compiled GDB, but I opted to just run vanilla Linux GDB in a Docker container.

To set up debugging, you can run script/run-vm.sh -S. Extra args are passed through to QEMU, which interprets -S to mean “freeze CPU at startup”, giving you an opportunity to set breakpoints in functions that run very early in the boot process. The only tricky bit with the Docker setup is getting GDB to find its way to the host IP address, which is accomplished with the special docker.for.mac.localhost hostname.

GDB in TUI Mode
Using Dockerized GDB in TUI Mode

The picture above shows the curses-based Text User Interface mode, which you can get into/out of by pressing CTRL-X CTRL-A. I’m sure there are lots of other GDB clients that can talk to the TCP port exposed by QEMU, and other ways to address the ELF compatibility issue, but the retro flavor of GDB TUI felt more aesthetically aligned with building a bespoke OS.

In my own environment, I finally tie the run-vm and run-gdb scripts together with a top-level script that pops open a few tmux panes so that all the various logs and tools are visible in one terminal window. That’s pretty specific to my environment though, so you’ll probably want to do fine tuning like that for yourself.

Bonus Tip: Hacking Fullscreen Mode

This last tip is arguably minor, but was extremely satisfying to figure out. QEMU has a fullscreen flag (which is used in script/run-vm.sh), but by default either using or not using this flag lead to the QEMU monitor opening behind my fullscreen terminal window (on the active monitor). The resultant clicking around and command-tabbing was surprisingly frustrating while iterating on certain bits of OS code.

I usually work with two monitors–my smaller laptop display on the side, where I’d ideally like the VM monitor to appear, and my main, big monitor. Getting the VM monitor to appear in the small display actually turned out to be pretty easy to achieve with a tiny patch to the Cocoa UI code in QEMU to make “fullscreen” mean “the main screen (that the menu bar is docked to in display preferences)”.

Conclusion and What Comes Next

That’s it for my humble summary of Mac OS Dev tips. I should end by thanking the awesome authors of The little book about OS development. They really did put together an incredible resource. I’ve also been going through the textbook by Tanenbaum that they recommend, and it’s way more readable and exciting than it would’ve been before doing any of the practical exercises in the little book.

As a teaser for a possible future post, I’ll add that if you have any interest on getting your OS to run on actual hardware, you may want to look into UEFI rather than creating an ISO and doing legacy/BIOS booting. Manipulating “raw” devices like USB sticks in the ways needed to make traditionally bootable drives on a Mac is a bit of a pain. UEFI is also generally more modern, robust, and well-documented. I recommend this high-level overview of UEFI as a starting point, and Tianocore and OVMF for BIOS images that can be used with QEMU to test out a UEFI setup. I’m still playing with all of this though and don’t feel quite qualified to give more concrete pointers than that … yet!

Champions of the Internet

I happened upon a blog post a while ago on Maciej Cegłowski’s Idle Words, called “Web Design: The First 100 Years” (apparently it’s actually a print adaptation of a talk he gave). In this post, Cegłowski proposes three different “visions of the internet”:

  1. Vision 1: CONNECT KNOWLEDGE, PEOPLE, AND CATS.
  2. Vision 2: FIX THE WORLD WITH SOFTWARE
  3. Vision 3: BECOME AS GODS, IMMORTAL CREATURES OF PURE ENERGY LIVING IN A CRYSTALLINE PARADISE OF OUR OWN CONSTRUCTION

The discussion of all of these possible visions–and the whole post really–is fantastic. You should read it all. The part of Cegłowski’s post that resonated most with me though, was the observation that Vision 1 is unambiguously the “correct” vision, and that the others are some combination of misguided and ridiculous.

Having spent most of my career in tech, and specifically in the Bay Area echo chamber, I am particularly tired of Vision 2. It’s hard to go a day without seeing a job posting encouraging ambitious developers to work for a company that’s “changing the world” by helping rich San Franciscans find parking, or an airport billboard for something like “The Private Firewall for your Public Cloud” (I wish to Christ I was making that up). Does software contribute to the economy and make some businesses more efficient? Sure. Did the internet make it easier for me to order a new Peugeot pepper grinder from the comfort of my bed last night? Of course it did. But the abundance of venture-backed companies making glossy web and mobile apps to solve nonexistent problems for other members of the tech elite is maddening.

Cegłowski also poked a bit of fun at Vision 3, foreseen by the likes of Ray Kurzweil and other “Singularity” proponents. I tend to agree with him here, but this vision causes less grief for me personally, probably because it’s so far-out and I’m exposed to it so much less than Vision 2.

It was Vision 1, and its “correctness”, that really stuck with me. In particular, this vision of the Internet immediately made me think of a number of my favorite websites, and the attitudes and values of their authors. Let’s call them “Champions of the Internet”. While most of these august netizens came to mind without very extensive thought, they all seem to satisfy a few criteria:

  1. They are not commercial: While some may do a little affiliate marketing or have found other ways to monetize their organic success, they seem to have been created mainly in the spirit of sharing a body of knowledge or creative output for free.
  2. They aren’t too polished: While some of the sites have perfectly serviceable designs, they are on average basic, functional layouts with mostly text/image content. No fancy Twitter/Facebook/Pinterest-style web appiness. They probably wouldn’t have looked too surprising to the Tim Berners-Lee of the 80s.
  3. They are the works of individuals: While a resource like Wikipedia is completely compatible with Vision 1, I find these masterworks of individuals to be more compelling somehow. They show how good the Internet is at enabling one person to make personal connections with the masses despite being separated by time, distance, or even death.
  4. They aren’t YouTubers: There are plenty of great YouTubers and similar content creators who pretty well satisfy my Champion-of-the-Internet criteria. I guess I exclude them here because while individual creators in this category have a Vision-1 outlook, platforms like YouTube are very Vision-2 compared to the much more democratic platform that is the Internet itself. The demonitization crisis of 2016 is a perfect example of how these creators aren’t quite able to achieve the democratic promise of Vision 1.
  5. They are substantial: Unlike other creations or memes like The Million Dollar Homepage or Keyboard Cat, these pages invite readers to return over and over again, for months or even years worth of original content.

Without further ado, allow me to present my Champions (in no particular order):

  1. Sheldon Brown: Creator of sheldonbrown.com, an encyclopedic reference of everything bicycle-related.
    scb_eagle
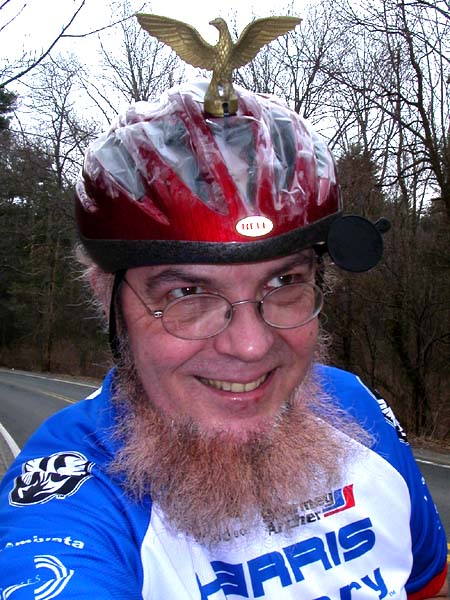
Brown passed away in 2008, but his site lives on as a both a memorial and a handy bicycle reference for future generations. I have to point out in particular his brilliant locking strategy–try it a couple times and you’ll never go back to locking through your frame.
  2. Allie Brosh: Author of blog/comic Hyperbole and a Half.
    depressiontwo8-2I first encountered Hyperbole and a Half through it’s amazing multipart post about depression, but the whole site is pure gold. Brosh is also the creator (albeit in her book) of my all-time favorite representation of procrastination.
  3. Peter Adeney (a.k.a. Mr. Money Mustache): Author of the Mr. Money Mustache financial advice blog.
    dd6821fade3d86b90bc411b4d9a8c144_400x400Mr. Money Mustache (or MMM) became internet-famous after retiring in his early thirties primarily by consuming less rather than necessarily earning much more than average. From retirement saving basics like safe withdrawal rates to much more philosophical pieces on urban planning and stoicism, MMM is guaranteed to teach you something about spending less, saving more, and generally getting closer to financial independence.
  4. Ken Rockwell: Creator of kenrockwell.com, perhaps the most comprehensive photography website on the Internet.
    kr-wap-1481-pxlIn addition to some great posts on why your camera doesn’t matter and noticing things, Ken Rockwell’s site has an incredibly comprehensive collection of reviews of both film and digital photography equipment. He may be a little controversial for some of his particular reviews or opinions, but without question the material on his site transformed photography for me from a fiddly, difficult technical exercise to a meditative, perspective-altering art form.

So there you have it, my humble list of Champions of the Internet. Who are your champions?